|
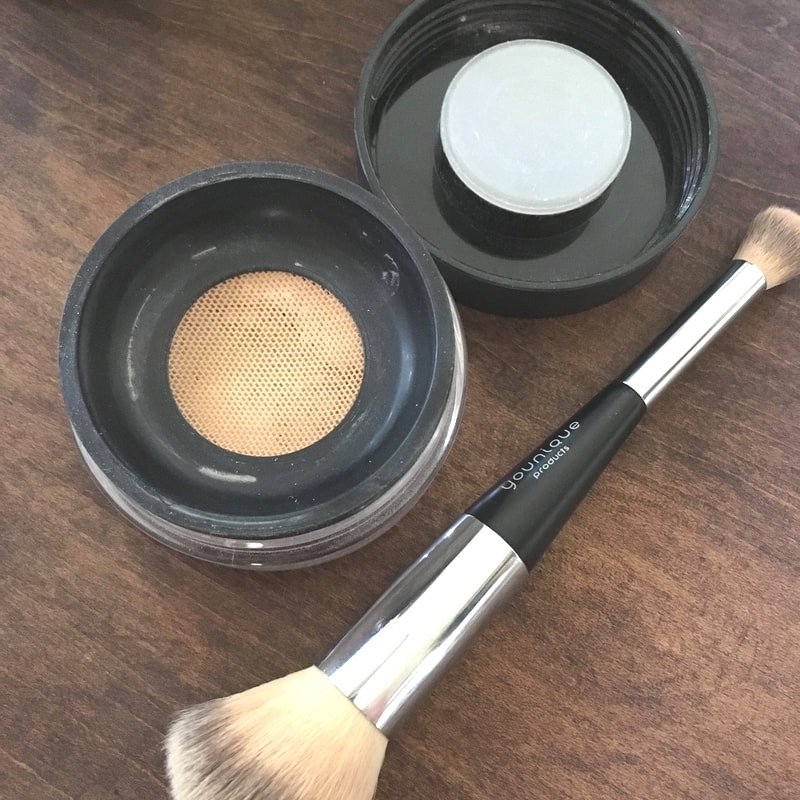
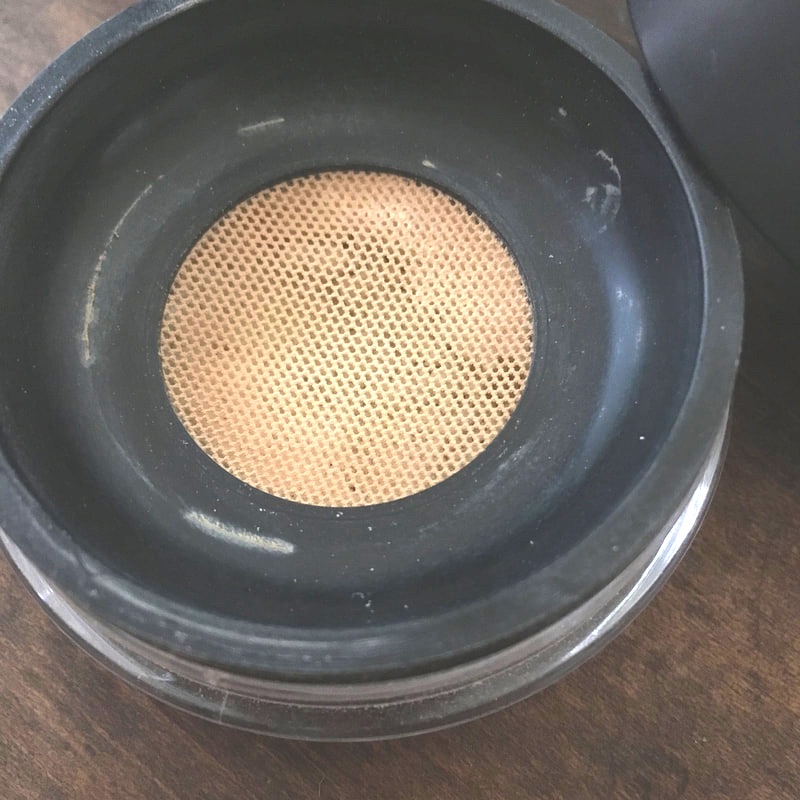
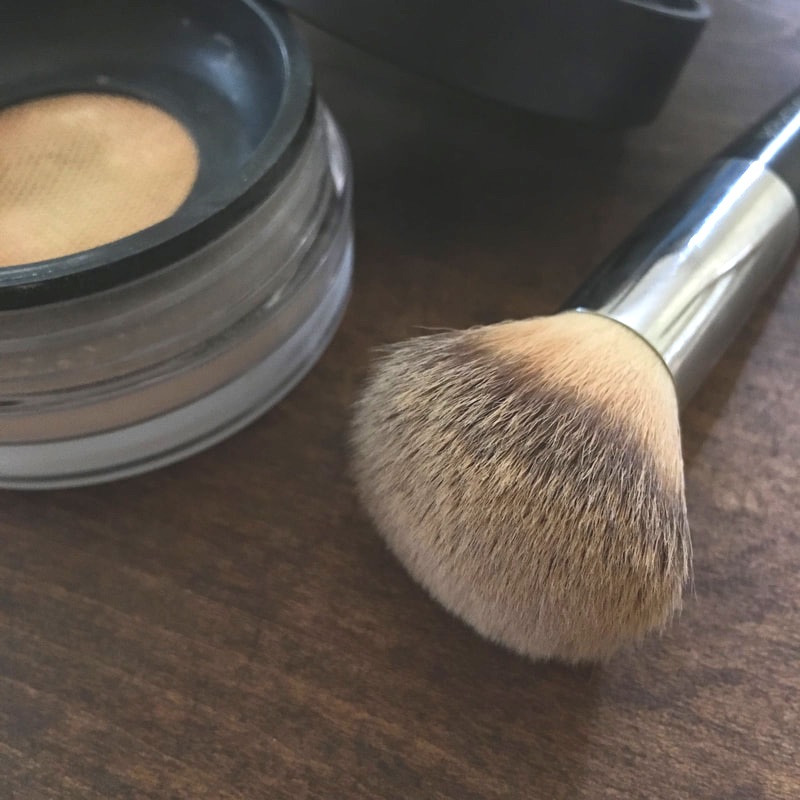
Who struggles to keep their makeup in place, especially in summer? We're all raising our hands with you, it's okay. I have tried different combinations of products over the years and put the following to the ultimate test at a beach wedding this past weekend. 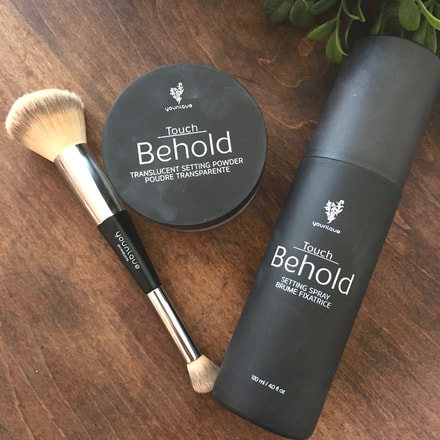 I did a super quick makeup application for the rehearsal, just using my usual cream concealer and pressed powder and tried a spritz of the Skindinavia Makeup Finishing Spray-Bridal. They formulated the infamous Urban Decay setting sprays after all, so I thought that would do the trick. Cue temps in the upward 90s and sweat dripping down my face, taking my makeup with it. For full disclosure, I should add that I skipped primer that morning. What can I say, I stayed up late the night before and was looking for a shortcut. Repeat after me: It's a crime not to prime. I use this one. Also cue the anxiety that I had opted out of having my makeup professionally done. I had visions of looking like a melting wax figure next to the other bridesmaids who were airbrushed to perfection. Fast forward to the big day, and I made sure to use the 3 products that go unseen but make a BIG difference! I applied primer, makeup as usual, and then this Behold Translucent Setting Powder all over. This particular product is extremely finely milled so that it helps blur imperfections without settling into fine lines and pores. This is a colorless product that provides a matte finish. And if you have dry or aging skin like I do, then you know not all setting powders are created equal!
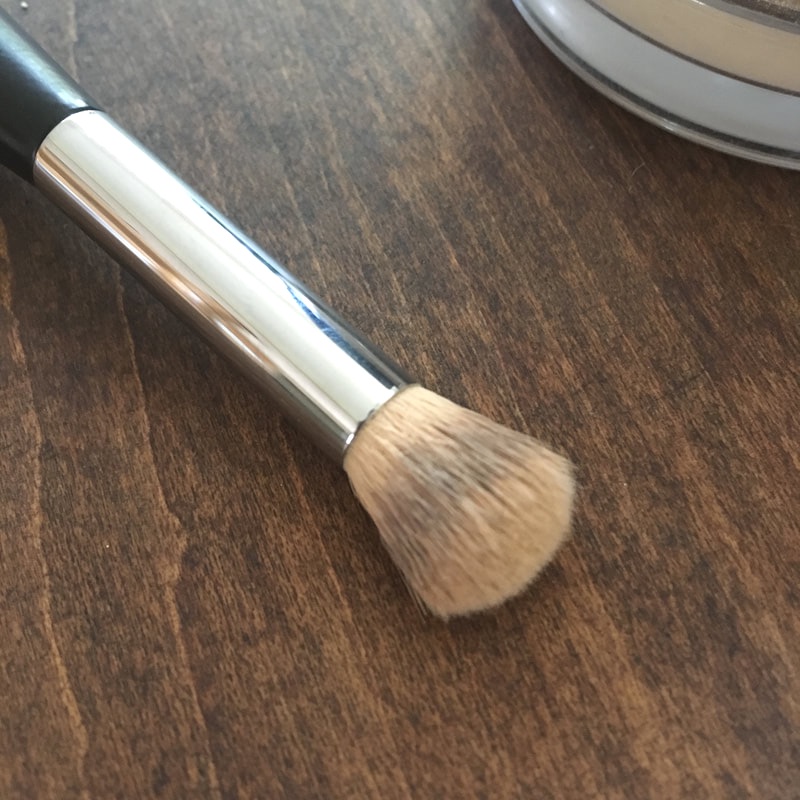
This Behold powder has a mesh screen and a plastic stopper so that the product doesn't spill all over your makeup bag. Another plus! I prefer to use this brush because it has micro-crystal fibers that are designed for strong powder pickup and release. And it has 2 ends! Sometimes I use the smaller concealer end to blend my cream concealer, and other times I use it to carefully set my eye area.
Finish off your look with a generous spritz of setting spray and you should be good to go! Setting spray is like hairspray for your face. Both the Behold Setting Spray & Skindinavia one are somewhat of a satin finish in my opinion, but they do make mattifying formulas. I added a light dusting of setting powder over my nose after spritzing my face and made it through the outdoor ceremony and the whole reception without any issues. Psst, this Behold Translucent Setting Powder came off back order TODAY so if you are interested go grab it now! I already purchased a backup after realizing this is what makes or breaks my makeup application. Click here to purchase! xo Sarah
7 Comments
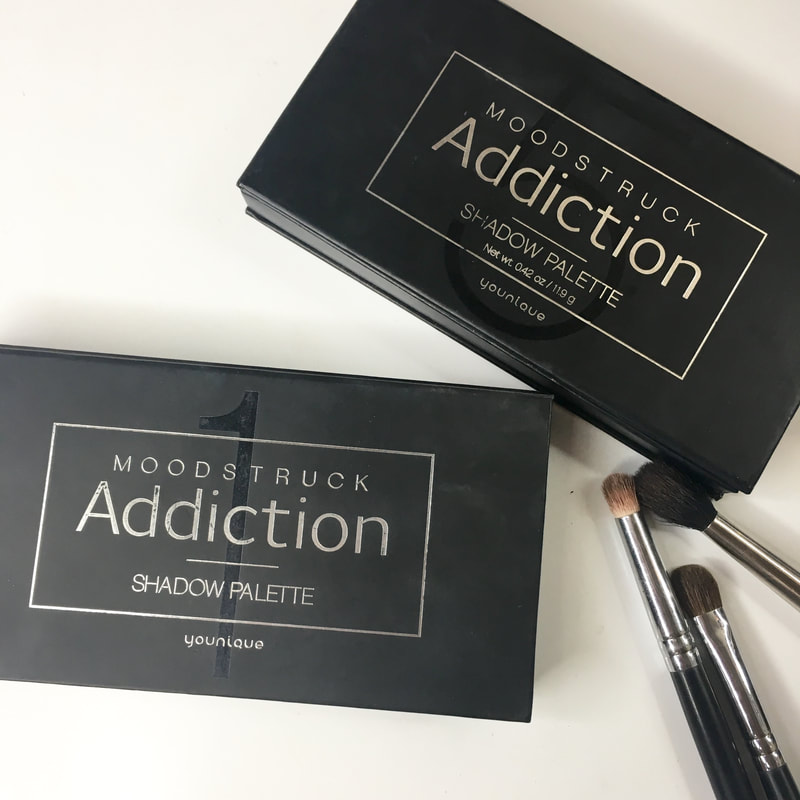
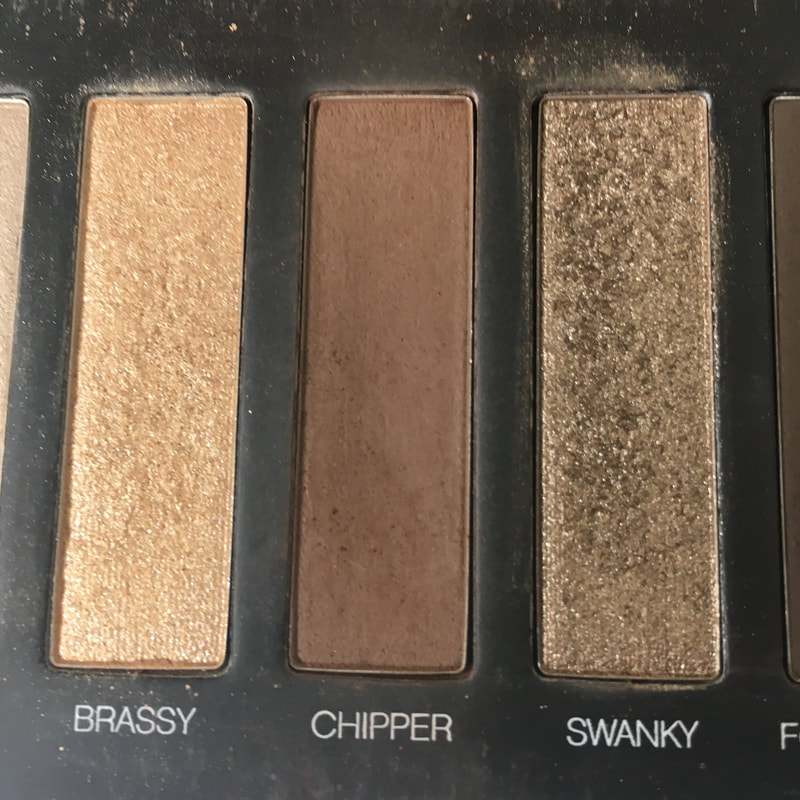
I don't know about you, but when I find a look that "works", I tend to stick to it. At least until the next new product comes along! For months now, I have found myself reaching for the same two eye shadow palettes to create almost all of my eye looks. And it's because the shadows blend so EASILY! Let me introduce you to two of my makeup BFFs: Addiction Palette 1 & Addiction Palette 5.
I'm not going to lie...Palette 5 scared me at first. It sat on my vanity for weeks before I had the courage to pick it up. But trust me when I say, it is the most versatile palette I have! And Palette 1 contains my holy grail crease color: Chipper. I'm pretty sure the messy interiors prove how loved these are. Ok, now onto my current fave makeup look.
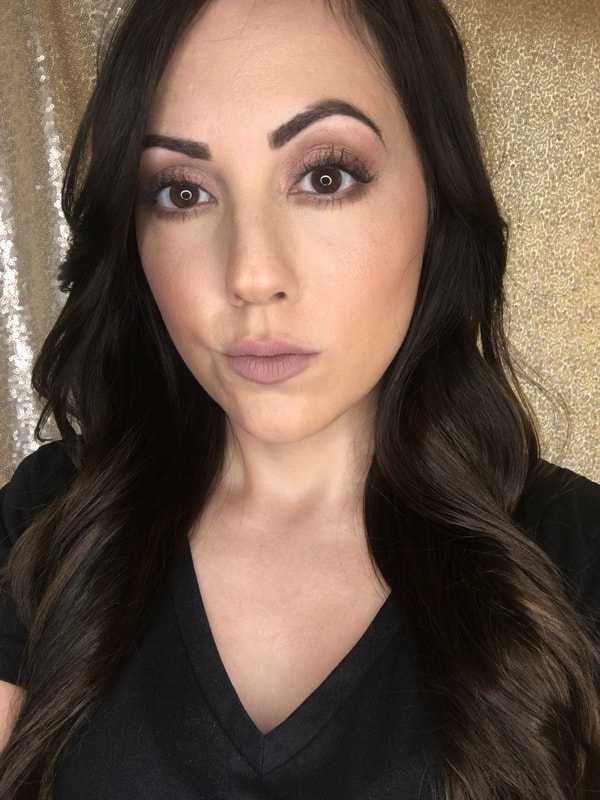
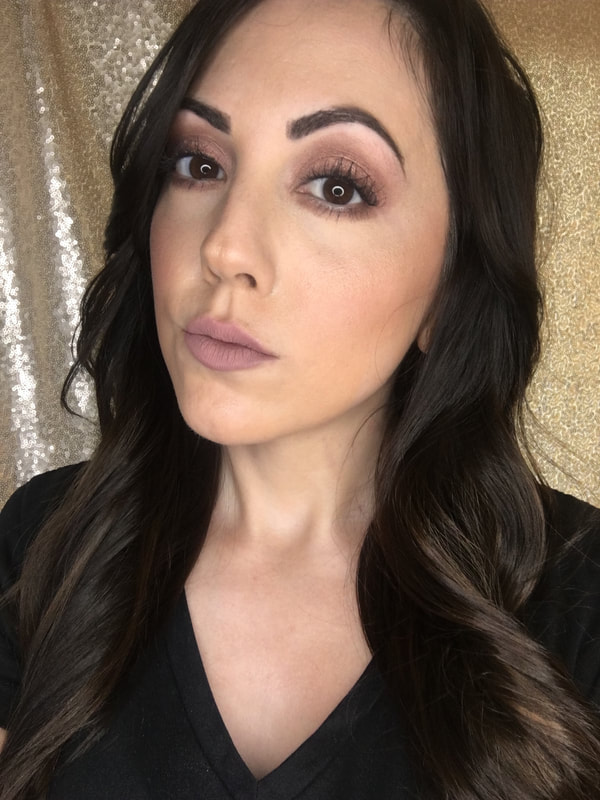
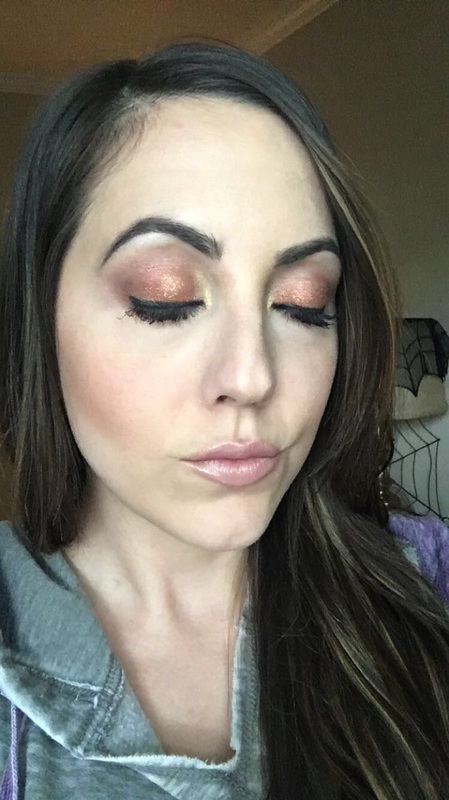
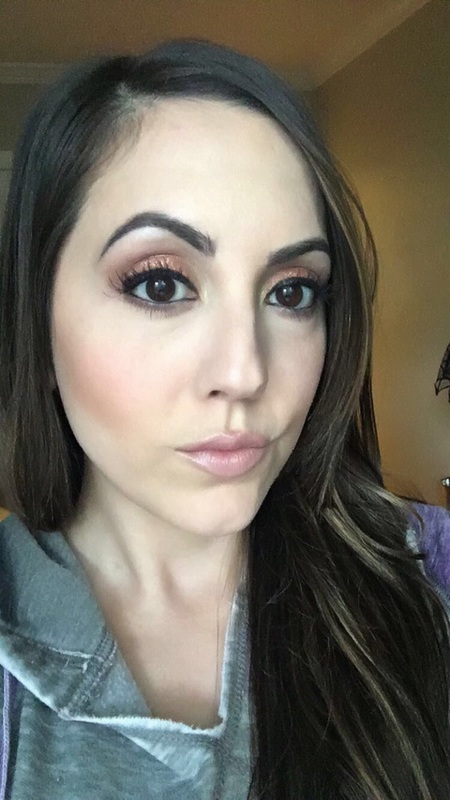
Who else is on Team Baby Hair Don't Care? I swear I have one trying to steal the show in every picture. I left these pictures completely uncropped & unfiltered so you can get the full effect. I used only two eye shadows to complete this look. And truth be told, if I'm really in a rush I use just the one.
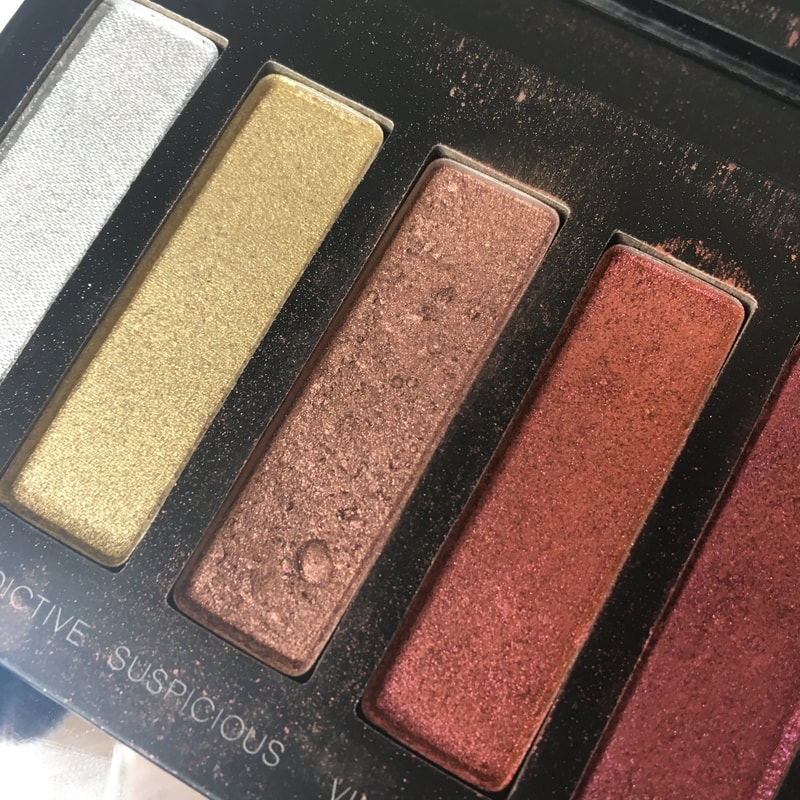
You ready to see how easy this is? Load up your eyeshadow brush with Suspicious from Palette 5. Tap off the excess and apply to the entire eyelid starting in the center. Open Palette 1 and swoop on in to Chipper and blend into the crease, starting at the outermost corner of the eye. Take a brush with a smaller end, I prefer this one, and apply Chipper at the lower lash line focusing on the outer corner and blending in. Then BLEND BLEND BLEND! Boom. Done. 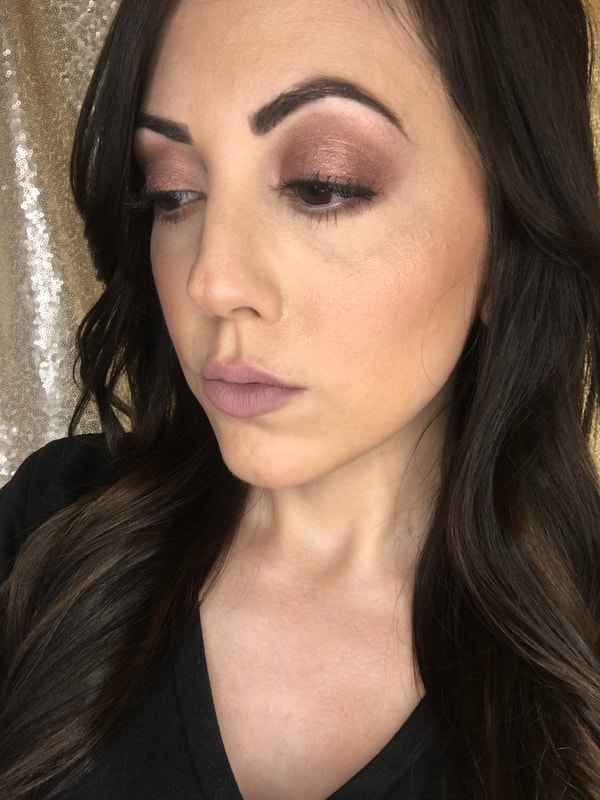 For the lips, I layered two liquid lipsticks. Mostly because I started applying the wrong one first because who doesn't get in a big rush when you're trying to get ready?! CoulourPop in Trap all over, which is a dusty greige, and then Midi (my fave) in the center. I'll list everything else I used in case you want to take a looksie (click to open the links):
FACE Touch Mineral Liquid Foundation in Taffeta Touch Skin Perfecting Concealer in Velour under the eyes Behold Translucent Setting Powder to set, especially under my eyes Mineral Powder in Fierce to contour my cheekbones w/ a fan brush Benefit Hervana Blush Box Touch a la mode Powder Luminizer in Lustrous on my cheekbones, brow bone & nose EYES Addiction Palettes 1 & 5 L'Oreal Voluminous Lash Paradise in Waterproof (I'll be reviewing this--stay tuned) Brow Obsession Palette in Dark w/ the best brow brush everrr LIPS ColourPop Ultra Matte Trap ColourPop Ultra Matte Midi If you recreate this look, use #fancylashesandlips so I can check it out! xo Sarah
YOU HAD ME AT PUMPKIN SPICELike any other #basic fall-loving woman, I am obsessed with pumpkin spice. Candles, coffees, cakes--I want it all! So I thought I would create this PSL-inspired eye makeup look to honor my favorite season. Here is what I used for this look: 🎃Splurge Cream Shadow in Defiant: http://bit.ly/Splurges 🎃Cream Shadow Brush: http://bit.ly/creamshadowbrush 🎃Crease Brush: http://bit.ly/creaseeyebrush 🎃Liner/Shader Brush: http://bit.ly/LinerShadeBrush 🎃Addiction Palette 5: http://bit.ly/AddictionEyes 🎃3D+ Mascara: http://bit.ly/3DPlus_Mascara_ 🎃Precision Pencil in Perfect (black): http://bit.ly/PencilEyeLiners If you recreate this look, use #fancylashesandlips so I can check it out! xo Sarah 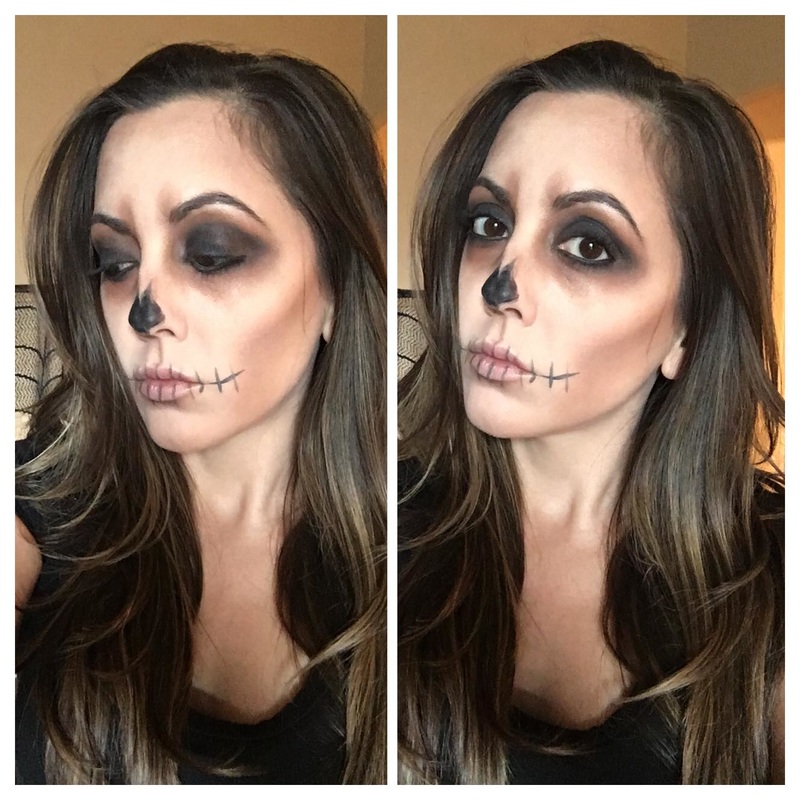 Here is another super easy Halloween Makeup look! I used a combination of black and brown eyeshadows to create this smokey skull effect. (Inspired by vickym0n on Instagram) Here is what I used for this look: 💀Touch Liquid Foundation(scarlet): http://bit.ly/TouchLF 💀Skin Perfecting Concealer (scarlet): http://bit.ly/CConcealers 💀MUFE HD Powder 💀Brow Liner in Dark: http://bit.ly/BrowsLiner 💀Bronzer in Sunset: http://bit.ly/bronzerduos 💀Addiction Palette 1 (chipper & forthright): http://bit.ly/AddictionEyes 💀Addiction Palette 3 (irate): http://bit.ly/AddictionEyes 💀Mineral Pigments in Provoked: http://bit.ly/LoosePigments 💀Precision Pencil in Perfect: http://bit.ly/PencilEyeLiners 💀Liquid Liner in Perfect: http://bit.ly/LiquidLiners 💀3D+ Mascara: http://bit.ly/3DPlus_Mascara_ If you recreate this look, use #fancylashesandlips so I can check it out!
xo Sarah  No costume? No problem! Watch this tutorial for an easy makeup look perfect for Halloween parties or trick or treating with your fam. Here is what I used for this look: Splurge Cream Shadows in Noble, Majestic, Whimsical & Skeptical: http://bit.ly/Splurges Cream Shadow Brush: http://bit.ly/creamshadowbrush Mineral Pigments in Devious & Glamorous: http://bit.ly/LoosePigments 3D+ Mascara: http://bit.ly/3DPlus_Mascara_ Precision Pencil in Perfect, Polished & Pristine: http://bit.ly/PencilEyeLiners Touch Liquid Foundation: http://bit.ly/TouchLF Skin Perfecting Concealer: http://bit.ly/CConcealers Liquid Lipstick in Spellbound: http://bit.ly/SPLASHLiquidLips If you recreate this look, use #fancylashesandlips so I can check it out!
xo Sarah
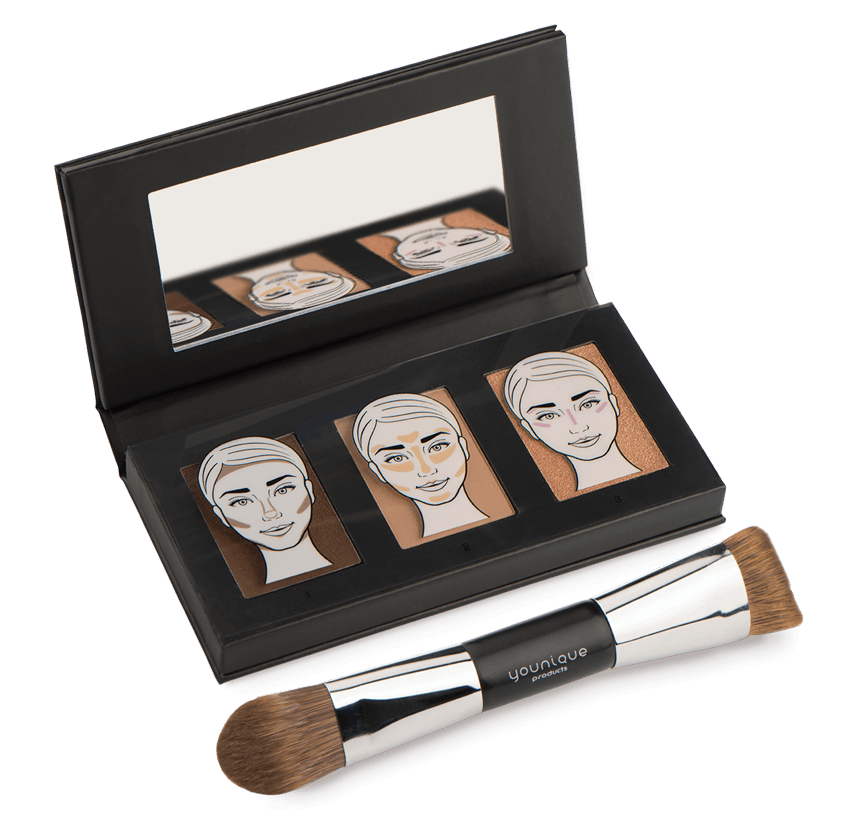
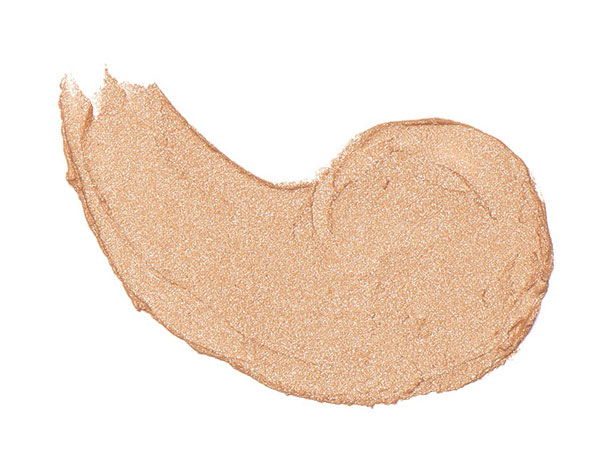
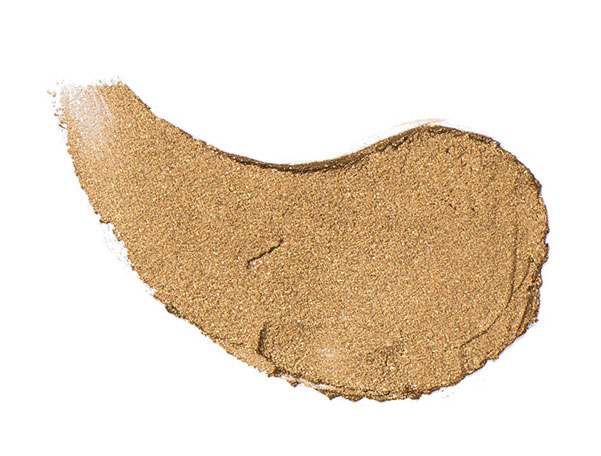
We have a new product that I'm obsessed with! Our Sculpting Trio is a contouring & highlighting palette that includes a velvet-y cream contour, matte highlighting powder, and a shimmery 3D cream for strobing. Available in 3 shades: light, medium, and dark. AND this month only you can get the brush for FREE! $81 value for $49? Yes, please.
Check out this tutorial on how to use the new Sculpting Trio:
It includes an instructional pamphlet AND has this cute little graphic to show you exactly where to place each product.
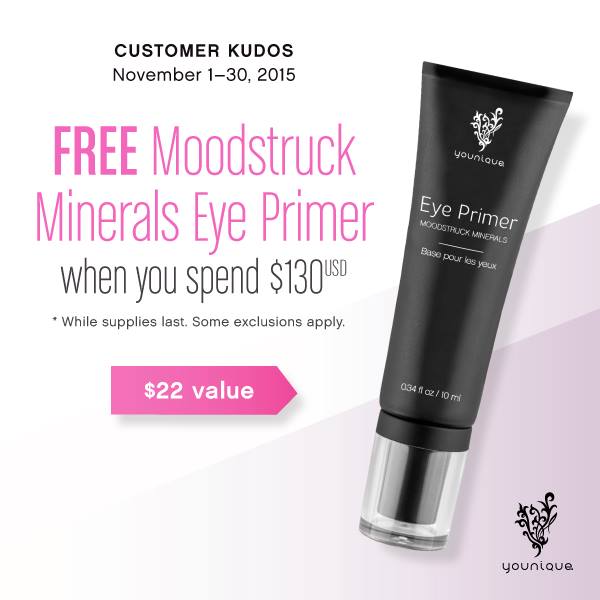 This month only, you can get a FREE Mineral Eye Primer that hasn't even been released yet! It's available with any $130 purchase, but I highly recommend our collections because they have already been bundled for big savings. Look at the difference this stuff makes! 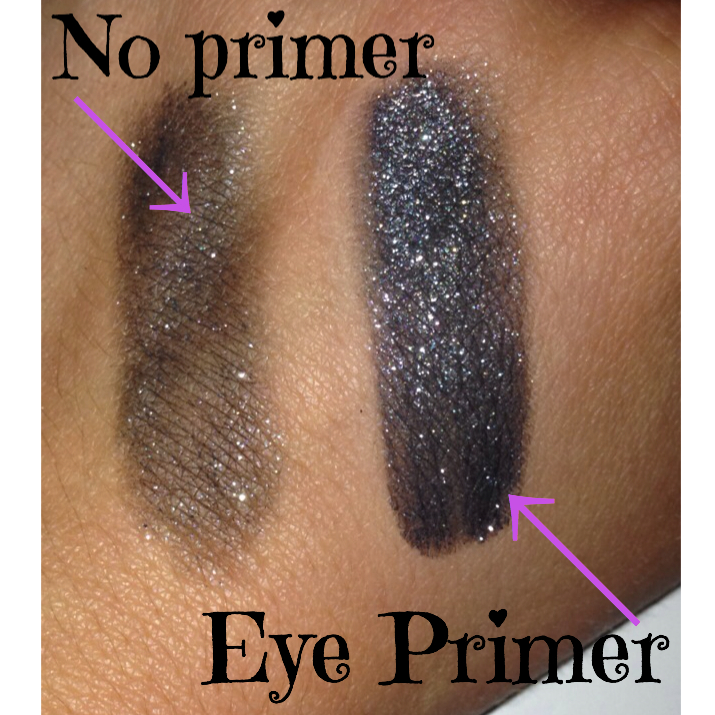 This product is specifically made to hold and intensify eye makeup for long-lasting, smooth application. It's crease-proof, smudge-proof, and transfer-free. YOU NEED THIS! www.fancylashesandlips.com xo Sarah  There is still time to take advantage of October's Kudos! For $75 you get 3 Splurge Cream Shadows of your choice & Shine Eye Makeup Remover Cloths. Splurge is one of my FAVORITE products, because they are so versatile! You can use them as an eye shadow, eye liner, highlighter, or on the lips. They do not crease and are long-wearing. Here are my top 3 choices that will flatter almost everyone:
Not sure how to use these? Check out this super easy tutorial below! They blend easily and dry to an almost powder finish. I highly recommend our Cream Shadow Brush. It's only $15 and will make application super easy! When using multiple shades, I just keep a towel nearby to wipe off before dipping into the next shade. 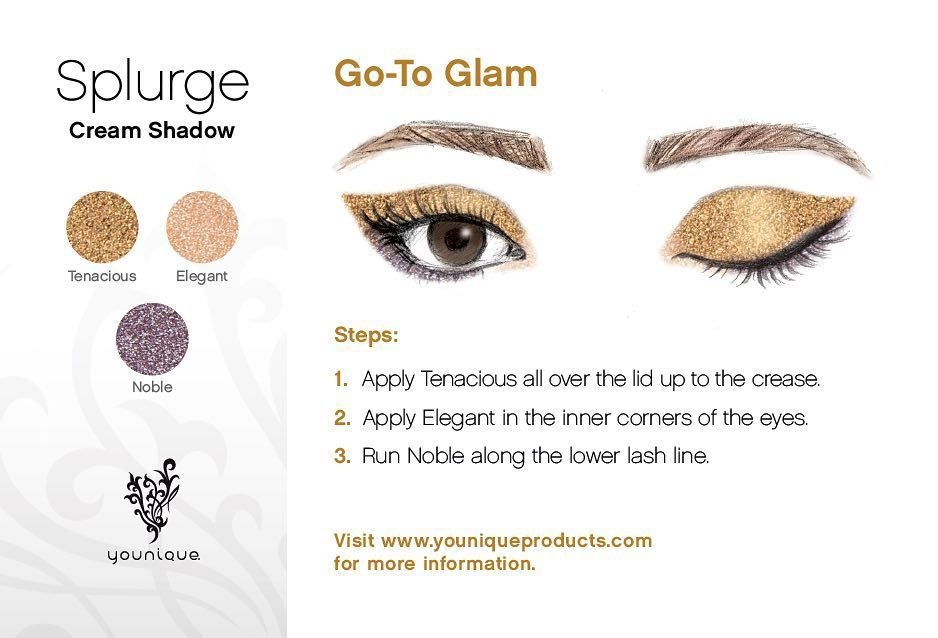 And when the day is over, and you are ready to fall into bed, you will have these Shine Cloths ready to quickly remove your makeup! Not only is Shine a makeup remover, it is also a skin treatment. Each Shine Cloth includes sunflower and olive oils, jojoba, vitamin E, and rosemary. I am not typically a fan of "makeup removing wipes" because I feel like I'm having to rub and pull at my eye area too much. The oils in these cloths break down the makeup (even our mascara!) with ease and when I'm too tired to do my whole skincare routine, these leave my skin moisturized as well. 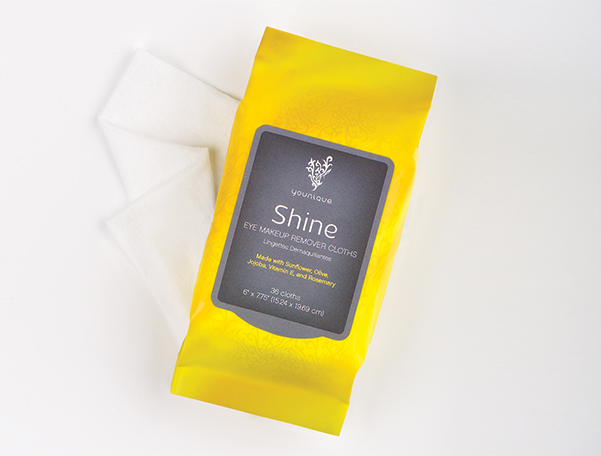 If you are interested in purchasing this Kudos, you have until the end of October and can click >right here<
If you miss this deal, we have a set of 3 Splurge Cream Shadows for $70 and they are $26 individually (and worth every penny). xo Sarah 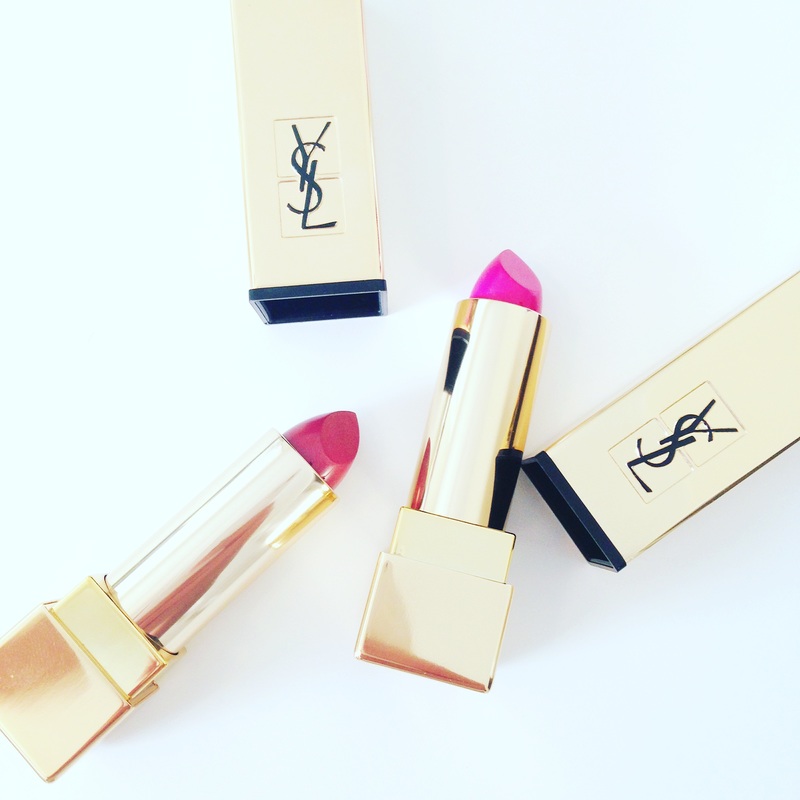 Influenster chose me to receive this complimentary YSL Rouge Pur Couture VoxBox for review. My favorite part about Yves Saint Laurent is their signature gold packaging. Their branding is continued with the YSL logo imprinted on the actual lipsticks. "In one stroke, get luxurious, rich color that dresses the lips with intense hydration and antioxidant care." The two colors that I received are both in the Pure Colour Satin Radiance line. 9 Rose Stiletto 19 Fuchsia 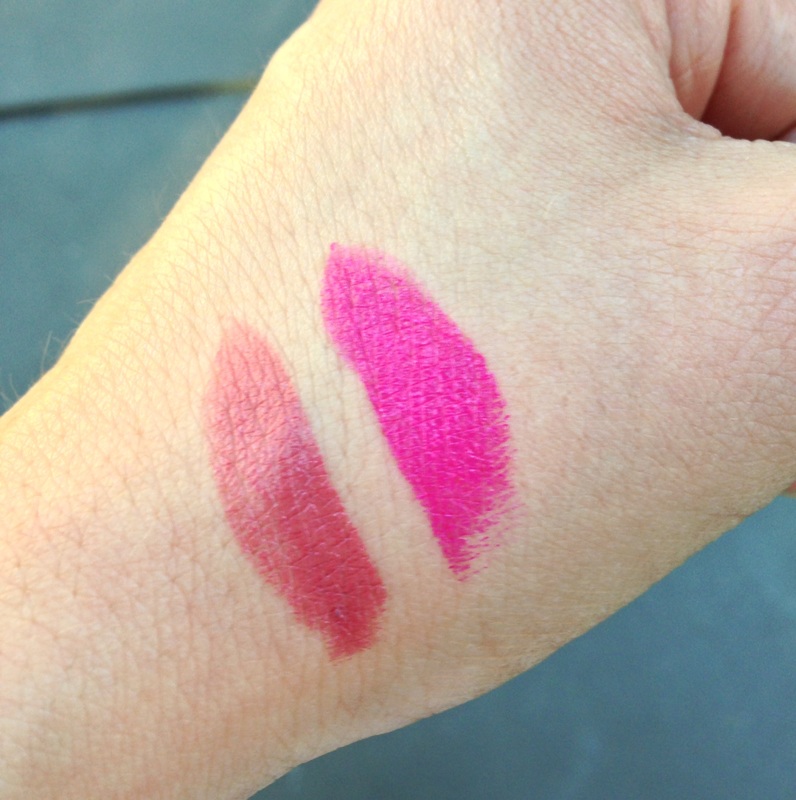 I swatched both shades on my hand and ventured outside to capture them in natural lighting. (Because I'm that dedicated.) The Rose Stiletto is a very nice natural color that I think most people could easily wear. I would pair it with my precision pencil in Pouty for a flawless look or Pompous to create an ombre lip.
The Fuchsia shade is definitely more bold and probably not for everyone, but I do personally like it. I would recommend pairing it with our precision pencil in Perky, to help it last longer throughout the day. These glam YSL lipsticks don't come cheap. They are $36 each and definitely a luxury item. While I would probably not personally buy one (because I get my luxury lipsticks for free--duh), I certainly have no problem receiving them as a gift! If you are interested in becoming an Influenster, you can click here. #YSLRougePurCouture xo Sarah
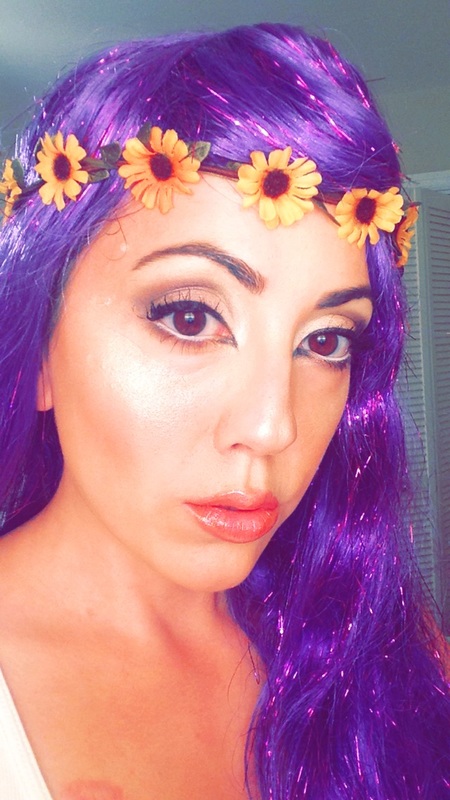
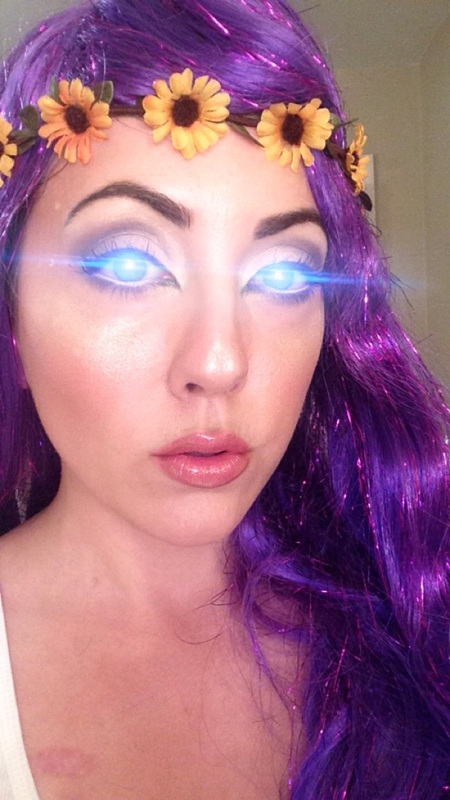
Here is what you will need to create this easy Woodland Fairy look. Start with a colorful wig, I purchased mine at Walmart for about $10. I topped it off with a flower headband I received as a gift (purchased from Target). And glowy makeup, here is what I used:
Primer: Glorious (let sit for 5-10 minutes) Foundation: Touch Cream in Velour Concealer: Touch Skin Perfecting in Velour Setting Powder: Moodstruck Mineral Concealer in Frivolous all over face Contour: Moodstruck Mineral Concealer in Fierce under cheekbones and at temples Highlight: Splurge Cream Shadow in Elegant and Moodstruck Minerals Pigment in Curious on cheekbones, cupid's bow, and down nose Cheeks: Moodstruck Mineral Blush in Sweet Brows: Precision Brow Gel & Liner Set in Dark Eyeshadow: 1. I placed Precision Pencil in Pristine in the inner corner of my eyes and blended out lightly. 2. Top that area with Moodstruck Minerals Pigment in Curious. 3. From Addiction Palette 3, I placed Cheeky in the crease and outer V. 4. From Palette 3, I used Flippant on the lid to blend the crease color into Curious. 5. With an angled brush, take cheeky and lightly line under the lower lash line. Liner: Precision Pencil in Perfect on the top & Pristine on the lower waterline. Extend the Perfect liner in the inner corners of the eye to create a point. Mascara: 3D+ mascara Lips: Line With Precision Pencil in Pouty, Highlight cupid's bow and lower lip with Pristine Liner. Top with Moodstruck Opulence Lipstick in Upscale. Colored contacts would be fun for this look, but since I didn't have any, I just took a pic in Snapchat. If you try this look, I want to see! All of the above products can be purchased on my website www.fancylashesandlips.com xo Sarah |
Sarah HouseTwo-time cancer survivor & beauty addict. 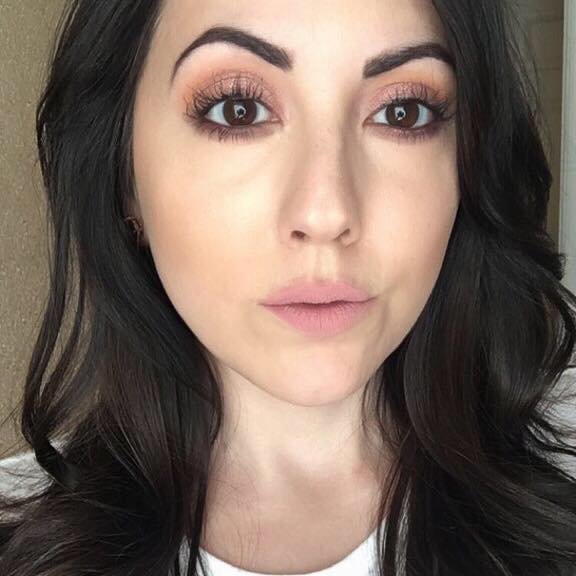
Beauty begins the moment you decide to be yourself. Don't forget to subscribe:
Archives
August 2019
Categories
All
@fancylashesandlipsDisclaimer:
All content is my own unless otherwise stated. Some links that I include for your convenience may be affiliate links which will pay me a small commission with no additional charge to you. |


 RSS Feed
